kitchen DIY banquette with storage
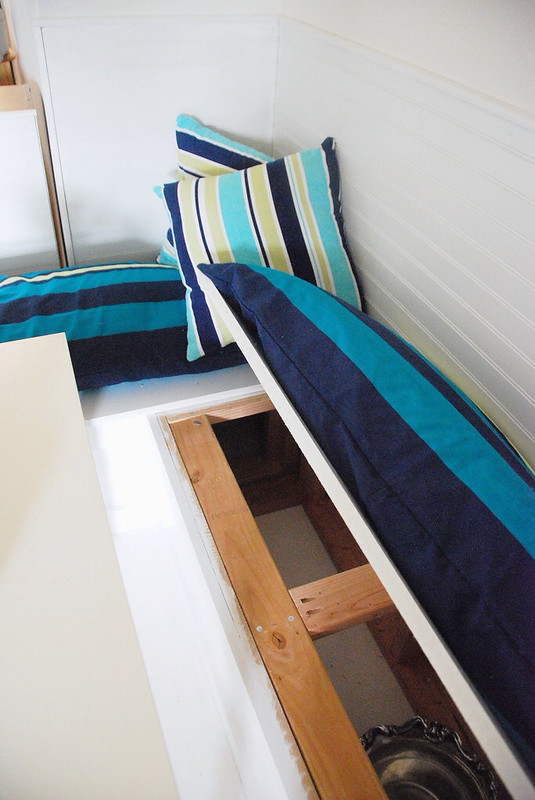
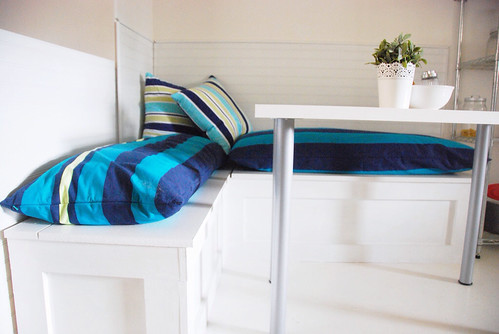
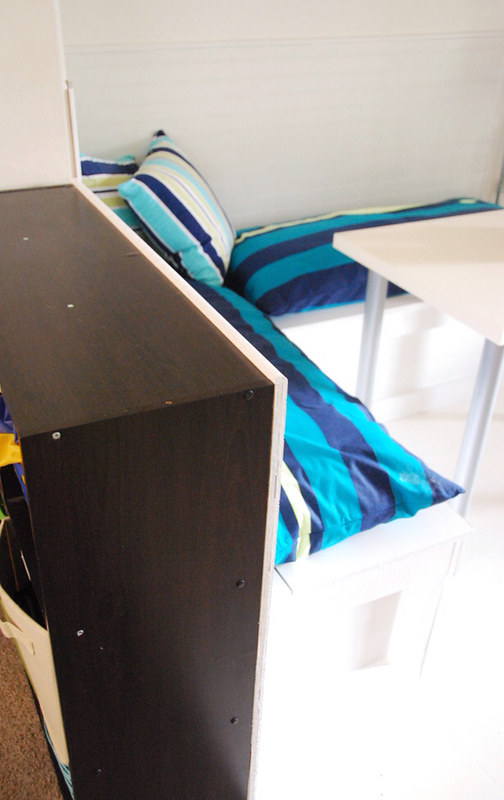
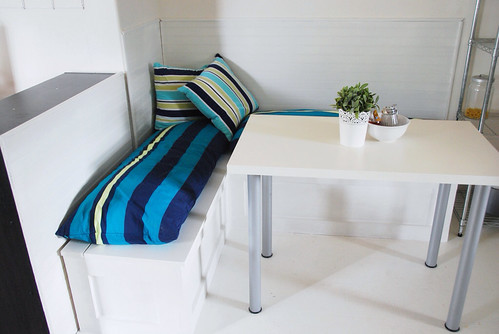
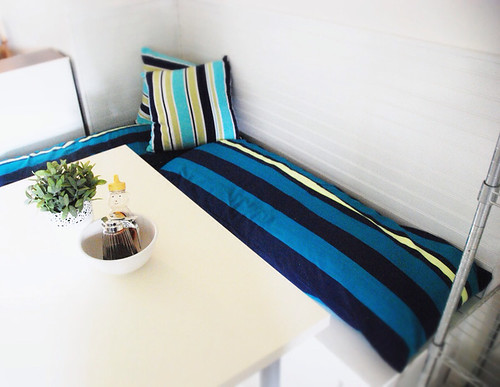
I will show off my pictures and then also the tutorial a long with the measurements and cuts we had to make and then you can customize it for your space. One great and easy fix was that I used body pillows with covers as the cushions on my seat. I know! Crazy right? At target the body pillows are only $10 each and the covers I got on clearance for $5. It's a long cheaper and easier than custom and for this shape, it fit better than outdoor seat cushions. They don't fit perfect but they fit pretty well actually and are super comfy to sit on.
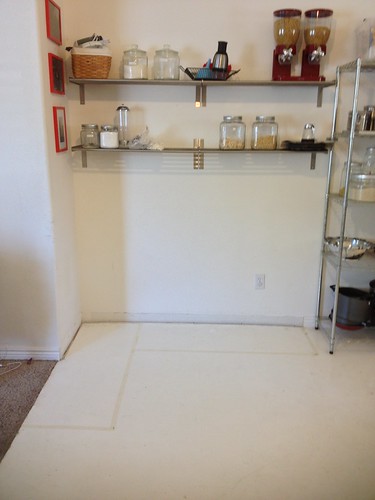
The measurements for a kitchen nook.
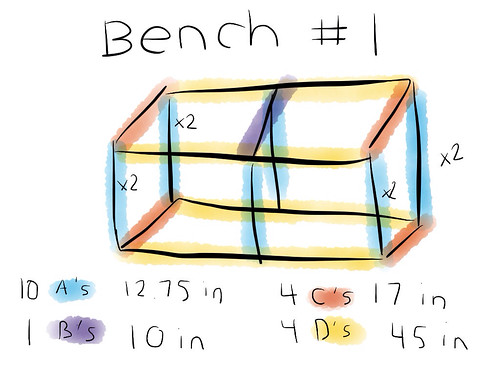
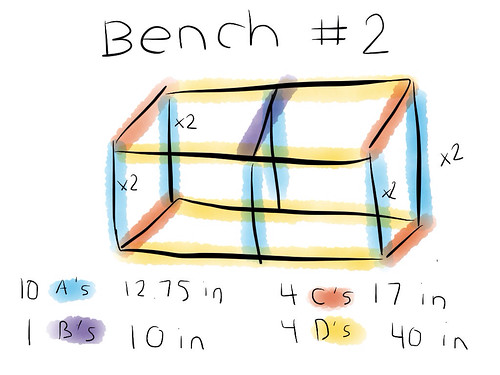
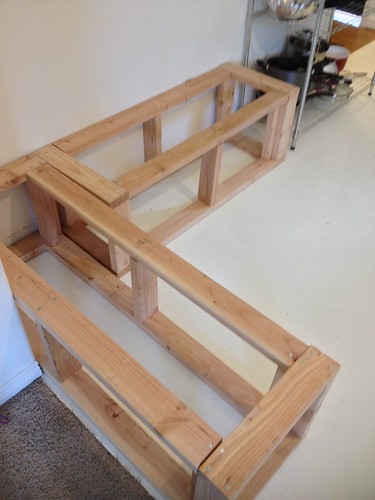
We built the frame using 2x4's and 3 inch nails.also, the x2 for the a cuts is because the back piece will overlap so that it can connect to the length pieces (d's) and create a box.
So these are the cuts for the frame.
Bench part #1 (the longer one)10 a's - 12.75 inches
1 b- 10 inches
4 c's -17 inches
4 d's- 45 inches
If you want to make it exactly as we did, you also will want to make part 2 and that one is exactly the same except it is 5 inches shorter so 40 inches.
Here are the cuts for the finishing wood:
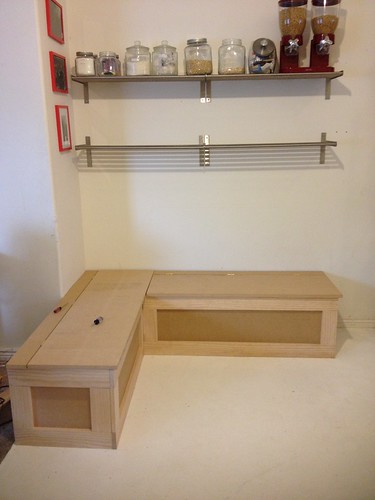
You should measure your frame once its done and alter these cuts as needed because sometimes if you don't frame it perfectly, my cuts could be off up to a quarter inch for you and so it's best to put together the frame and then measure and see if any of yours are different the measurements that worked for us for the finishing wood.The wood we used was 3/4 of an inch, if you use a different thickness, you will need to adjust your measurements.
1- 53 3/4 x 15 1/2 wood (lid)
1- 53 3/4 x 3 1/2 (back base that attaches to the hinge)
1- 35 7/8 x 15 3/4 (front) (this is longer because it gets covered by the bench #2)
2- 17x 15 3/4 (one on each side)
Borders on the finishing wood 4 - 8 3/4 x 3 1/2 and 2- 47 7/8 x 3 1/2 and they are also 3/4 of an inch thick. For bench 2, you will need 4 - 8 3/4 x 3 1/2 and 2- 47 7/8 x 3 1/2
(Bench #2 - instead of 35 7/8 x 15 3/4, it's 471/8 x 15 3/4, instead of 53 3/4 x 3 1/2, it's 47x 3 1/2, instead of 53 3/4 x 15 1/2, it's 47 x 15 1/2)
Other materials needed:
Hinges
Bead board
Molding
Tools needed:
Table saw, we tried to use a circular and the cuts weren't always straight enough so we got ours cut at Home Depot since we do not own a table saw. This is especially important that they are straight for the wood around the frame since that is what will be seen and noticeable. For the frame we used our circular saw for most of it and did fine. Home depot typically charges .25 per cut but you could call your local Home Depot for more information.
Hammer
Drill
Pocket Hole Jig Bit
The 9 step kitchen bench tutorial
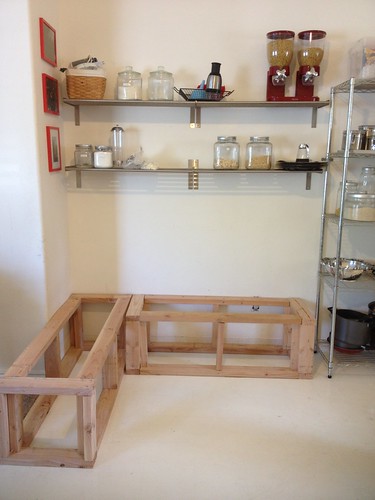
1. First tape off and measure the area you are wanting to put your nook.2. Then build the frame. Make the cuts listed using 2x4's and nail them in. We built the frame in the garage and then moved it into the kitchen.
3. Nail the frame into the floor
4. Get the cuts to finish building that are listed.
6. Add the bead board and the molding. Measure the wall area around your nook. Also measure the molding pieces you choose. Pay attention to the angles to align the molding. We had trouble with this step. We forgot about matching the molding from corners, etc. To attach the molding and beadboard, we used wood glue and nails but you could also use liquid nails. We had to use a few nails on some of the molding pieces to keep them in place.
7. Paint! I painted mine white. You could stain it if you would rather a wood look. I actually still need another coat of paint on mine and I have already painted 2 layers. I will advise you to not get the cheap paint at walmart I got. It did not work well. I really recommend a paint with paint and primer in it. With every project I have done, it just has worked so much better. I wish I would remember that every time I choose a cheaper paint and think it won't matter that much. I used a roller for most of it and then a brush for the corners and edges I couldn't get to. You will need at least 2 coats no matter what paint you get. I also used putty and paint to touch up any nail holes in the molding or bead board.
8. The cushions. I went super simple. If you are a sewing whiz, you could easily make your own custom cushions that would be ideal however I needed a solution without sewing and without tons of hassle. I measured all of the outdoor cushions at target, walmart, Home Depot, ikea, etc. and couldn't find anything in the right size that would work and then I tried my body pillow in my bedroom and it worked the best. I bought two at target for $10 each and then the covers were on sale for $5 each. I also found 2 outdoor pillows to cover up empty spots since the body pillows don't fit perfectly. I have to say, it's been awesome. It is so comfortable and simple and I personally think it looks great.
9. Make yourself a nice meal, sit down, and admire the work you have done.



2 comments:
It looks so great! You guys are amazing!!
Thiis is awesome
Post a Comment