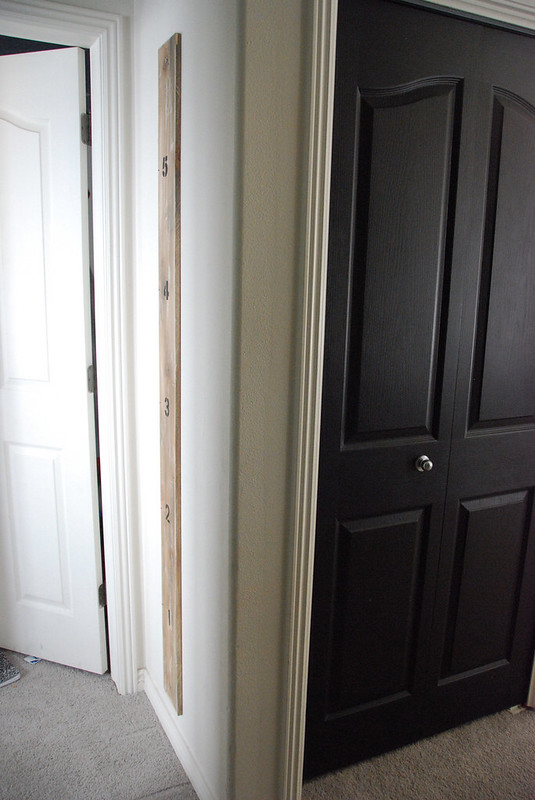
we made this for our boys last year for christmas and I love it. We have used it throughout the year to see how much our boys have grown and the best part is, if we ever move we can simply take it off the wall and take it with us.
The other great part about this diy growth chart is it only cost us $13 to make and it could be even cheaper depending on how you choose to make it and what you may already have at home.
What you will need:
some wood stain $3
1x6 piece of wood $3
black paint and a small brush $2
number stencils $2
a drill and screws $1 (only for screws)
a small stool (optional-read below)
white craft paint and a foam brush $2 (optional)
1. Before you start, you will want to decide whether or not you will be using a small step stool like we did. If you are not going to use a stool, you will want to measure your baseboards and maybe start at 1" instead of 0" like we did. That way when they are standing against the wall, they will be able to measured accurately. If you use a step stool, you can just drill it onto the wall right after the step stool would end. Hopefully I have explained that well.
2. After you have bought your wood, you will want to stain it. If it has rough spots, you will also want to sand it so be sure to check for that and if you are not wanting to sand at all, choose a piece of wood that is very smooth from the beginning. You can read my instructions and tips on how to stain wood here. Staining is a step you can skip if you don't want it stained. I just really liked the stained look.
3. I bought a package of letter stencils at Walmart. You can find some in the craft area or also where they sell mailboxes.I then just measured and traced the numbers with a pencil. Many have asked why you can just sponge paint over the stencils rather than tracing and you can try that, however I have never had good results that way. They always see to smear or don't get covered fully and so then it looks more like a blob so my advice would be to stencil it with a pencil first. You might also check Dollar Tree for a cheaper set of stencils. You could also use a cricut to make stencils for letters.
4. At this point, I took my black acrylic craft paint and carefully painted in the penciled numbers. I also outlined the lines next to the numbers with black acrylic paint. Allow it time to dry. After it had dried, I used a foam brush to streak some white paint across in random places. I wanted it to look vintage and artsy. This is an optional step. I faded it a lot by doing a very thin white coat and brushing it away with a paper towel.
5. Attach it to the wall. You will want to use a stud finer. If you don't have one, here is a link on "how to knock and find studs" by how stuff works. We did the knocking stratefy for a long time it worked, just took longer so if you have many projects that recommend stud finders, I would definitely recommend buying one. If not, go for the knocking approach. You can drill a hole into the top of the wood piece and the bottom and then drill it into the wall so you don't crack the wood.


No comments:
Post a Comment