


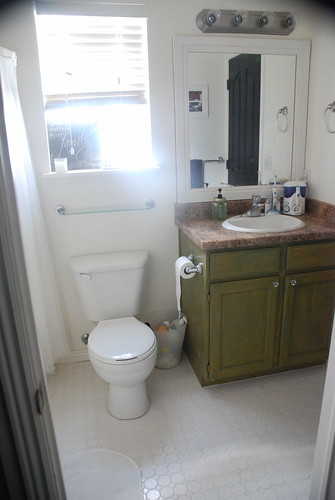
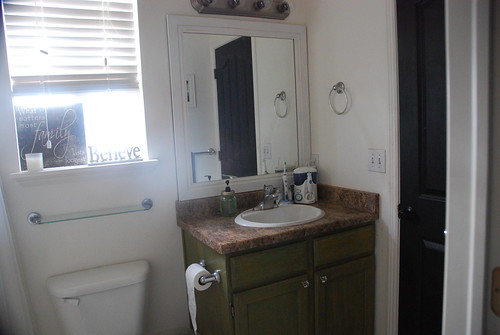
$200 Old Fashioned Master Bathroom Makeover
it's finally done! yippee. Now if only the rest of our house is done. We are making lots of progress though. You should be seeing a makeover posted every week now for the next little while because the kitchen is almost done, the kids bath is almost done, and the master bedroom is in progress.Alright so for our master bathroom, I wanted something that was clean, old fashioned, and full of farmhouse charm. Our home is rather new (built in 2003) and it was built without any charm, or extras. It is rather plain. After realizing we weren't going to move for a while, Jared and I both decided that we would put some charm back into this house. One of the worst decisions that the home builders made for this home and its quite puzzling is they chose to put carpet in our master bathroom!!! I never get why anyone would want carpet in a bathroom. It's just darn silly so from day 1, we wanted to tile the bathroom but had avoided the job until now. Take a look at my many tutorials for how to create this wonderful master bathroom and hopefully it will give you (my readers) some future inspiration for your home.
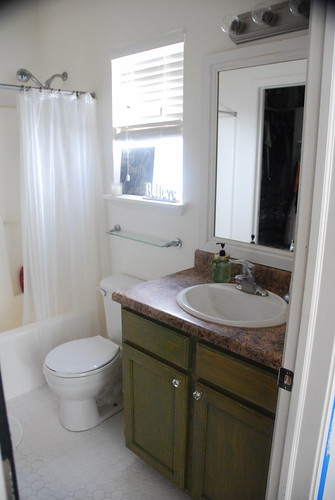
Before and After

Tiling the Bathroom
ok so my husband and I are not tiling professionals, perhaps in a few projects, I will feel "skilled" enough to tell you step by step how to do it but I would hate to tell you the wrong thing. What I can tell you is the basics. We pulled the carpet up, and took all of the tack boards off and also the floor molding. We also took the toilet out of the bathroom. We then put in a new subfloor by cutting it and laying it down to fit the area as best we could. After that, we began to lay the tiles on the floor. This was time consuming. We cut the tiles to fit around the places that didn't fit which was what took so long but after that. we began to lay down grout and stick them down. After that we grouted through around the edges. We washed the tiles after that, and last put the sealant down. You want the floor to be super clean before sealing it and We sealed it twice. Anyway, hopefully that gives you an idea of how to tile but if you want better instructions and step by step instruction, here is a great tutorial: this old house
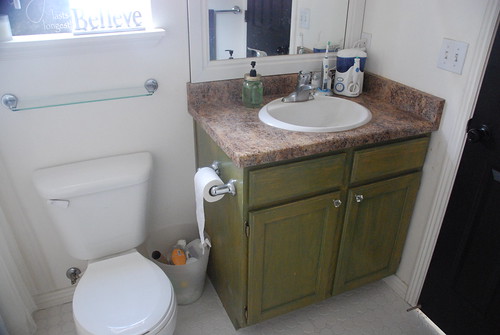
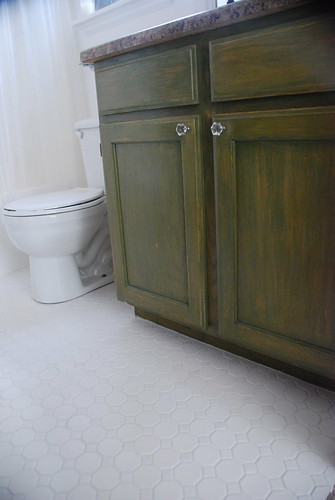
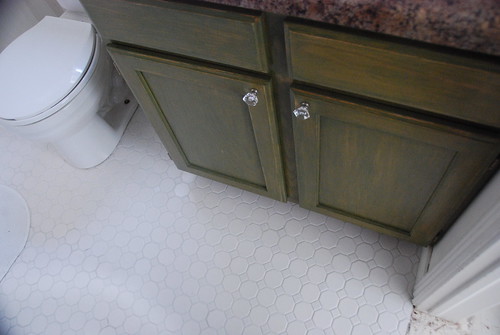
Green Stained Cabinets
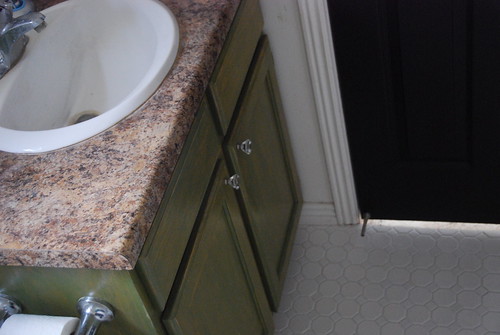
I did an earlier post talking about the green stained cabinets. Feel free to take a look at that for a few more up close pictures. We purchased the green stain at Ikea. Putting a stain down is pretty simple but it does take focus because you don't want it to look splotchy in the end. I think overall painting and staining is about the same amount of work. To stain, we used a pair of medical glvoes, and some old socks. Put the medical glove on first so that you don't end up with stain all over your hands, and then put an old sock on...this seems to be the easiest way to lay down a stain without ending up with streaks. I have used rags before and they work but I like using an old sock. It goes faster and smoother. If your cabinets already have a paint on them, you will want to strip it. If they have a coat of polyeurathane (a sheen to them), you will want to sand them down pretty well before laying down the stain. After you have laid down the stain, simply brush a coat of polyeurathane back on the cabinets. I wanted a little weathered look so after I stained the cabinets, and laid the polyeurathane sheen down, I sanded the edges a bit so it looked "old fashioned"
White Molding Mirror Frame

I have an earlier post with pictures and steps on how to create the white molding mirror frame. I got some inspiration from a bunch of blogs but mainly but I should mention House of Smiths. because I followed their tutorial pretty closely. Their are a few differences but definitely check out both my tutorial and the house of smiths' to go about creating your own. I am currently making a black frame for the kids bath which should be posted soon as well. Such a great idea!
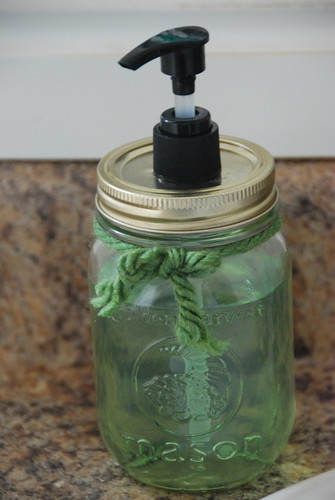
Mason Jar Soap Dispenser
The mason jar soap dispenser craft is not my original idea. I found so many great tutorials on how to make this. It's very simple and if you have a drill, a mason jar, and a soap dispenser pump...you CAN create this with little crafting experience. I basically followed the instructions from this tutorial: She Knows Mason Jar Soap Dispenser. I didn't paint my lid however and I just tied a string of yarn on it. I purchased a liquid soap container at Dollar Tree and also a mason jar and that was pretty much all I needed. Take a look at the tutorial for more instructions.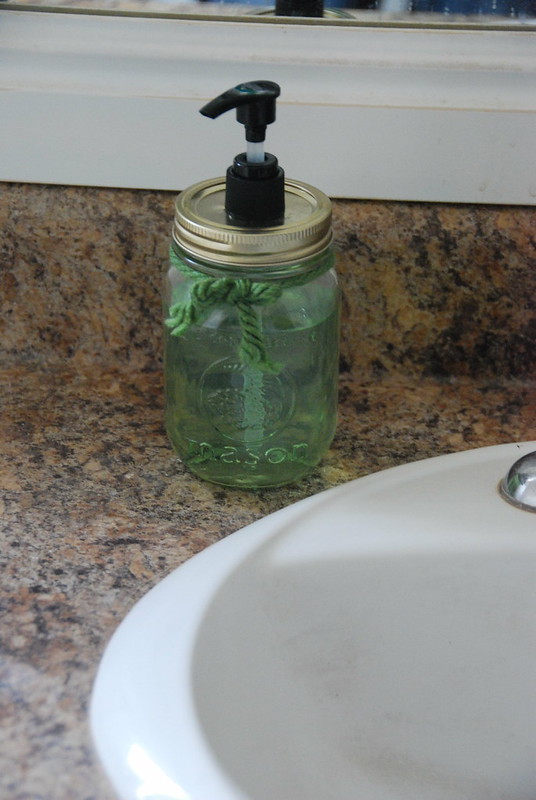
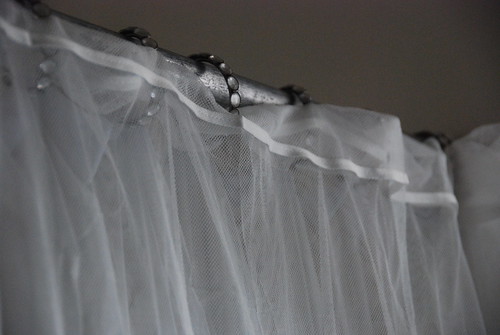
Easy Ikea Shower Curtain
Oh man! so this was so simple and easy but I love my shower curtain now. I have had quite a few over the years but they were so bulky and we have such a small bathroom that I need every little bit of room I can get and so the idea of having a shower curtain that hung down on the ground and just looked bulgy and cumbersome was not appealing to me. I bought a pair of lill curtains. They were only $5 at Ikea. I only used one of the curtains. I then cut off the bottom so that it was smaller and didn't drag on the ground. I love the light feel of it. I do have a liner and you will need one because the lill curtains are sheer and have little itty holes so you don't want water everywhere. You can buy a really cheap shower curtain liner at The Dollar Tree or Walmart though. just attach them together by pushing the shower curtain rings through the light lill curtain fabric. I didn't cut holes for it or anything. I just pushed the fabric holes into the curtain rings and it works fine. You can trim it without needing to hem this fabric. It's very light and similar to mosquitto netting.
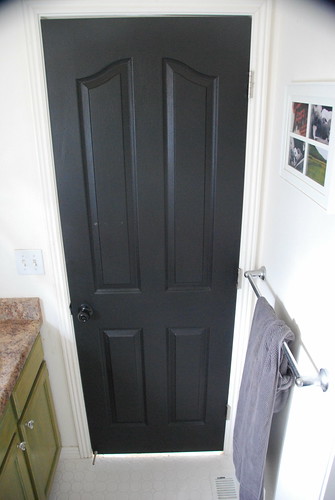
Black Door
I have been painting all of my doors black, as well as the knobs. It's almost done. We are on the last few doors but I love the look of it with this old fashioned bath. It really pulls it all together. I will post a tutorial with more info on the black doors soon and will link it here. For now, we painted the doors using interior black paint and roller brushes. It took some time but looks great. For the door knobs, I used a black satin spray paint. I hung the knobs up on a ladder outside with a drop cloth underneath and I sprayed away. I had to do 2 coats.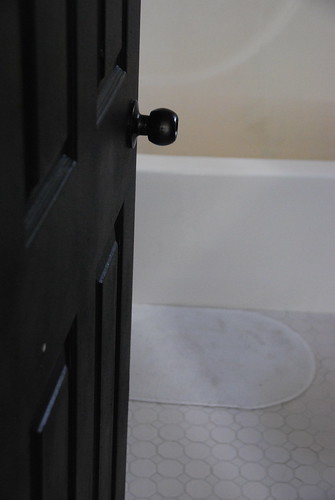
Cost Breakdown
black paint & spray paint for doors total=$3.75 per door $30 for 8 doors ($20 for paint, $5 for spray paint, $5 for brushes, rollers, etc.)white tile, grout, subfloor, and supplies total= $170 (unfortunately I didn't keep an accurate breakdown of this. I only know the total of what it took to tile our floor. My rough estimate would be that $75-80 for tile, and then the rest went to supplies and tools we needed).
green stain, old socks, sanding paper total=$6 ($5 for green stain, $1 for sanding paper at dollar tree)
white molding frame for mirror total=$15 ($10 for molding, $5 super glue, (we already had wood putty))
ikea curtain, curtain liner total= $6 ($5 for lill curtains, $1 for curtain liner)
total =$200.75
2 comments:
I absolutely love the stained cabinet!
Generally, all baths require adequate lighting and good ventilation. For flooring, tile designs are beneficial because these kinds don’t get slippery when wet. Actually, when we remodeled our bathroom, we used antibacterial tiles. We also installed a heating and cooling system underneath the tiles in order for the floor to radiate heat or cold according to the setting. It's a bit expensive, but still it's efficient in many ways.
Post a Comment